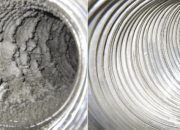
Do you know when you last cleaned your clothes dryer vent? Most homeowners are unaware that regular dryer vent cleaning is a critical part of proper dryer maintenance. Accumulated lint and debris in the dryer vent present a serious fire hazard, so regular cleaning is a must. Fortunately, a quick vacuuming inside and outside can keep your dryer vent clear. That being said, how you clean and what you clean are important. Read on to learn more about the things you should know about dryer vent cleaning.
How To Tell Your Dryer Vent Needs Cleaning
If your dryer vent is partially blocked, you may have noticed it seems to take progressively longer to dry laundry. You may also have noticed that the dryer itself is hot to the touch on the inside after you’ve run a load of wash through it. The most likely explanation for both is that the vent is partially or completely blocked.
Clothes dryers have lint traps and vent filters to catch loose lint and debris from your clothing, but sometimes these make it past both. When this happens, blockage occurs and the dryer can heat up to dangerous levels while attempting to dry your clothes. If the air in the dryer gets hot enough, it can even ignite the extra dry lint and cause a dryer fire or dyer duct fire. Clearly, for your safety and the safety of your family, your dryer vent needs to be cleaned urgently.
Proper Dryer Vent Cleaning
Some handy homeowners prefer to take the DIY approach to dryer vent cleaning. It is a simple enough procedure that if you have a vacuum with a long hose or a shop vac, anyone can do it. Here’s the step-by-step process for properly cleaning your dryer vent from end to end.
Step 1: Begin by finding where the duct starts and ends. Most dyer setups have a 4-inch exhaust connecting running through a flexible aluminum hose to the outside exhaust port. Hot air from the dryer flows through the ductwork and out the exhaust port smoothly when the dryer vent and lint trap are clear.
Step 2: Unplug your dyer’s power cord from the outlet, or if it’s a gas dryer, shut off the gas/propane valve. Loosen any clamps or metal tape around the vent so you can pull the flexible hose off of the dryer vent and the exhaust port.
If you are working with a gas dryer, be very careful not to disturb/damage the gas line when you unplug the dryer from power. If you aren’t confident you can do this safely, call a professional. Gas leaks are extremely dangerous, and stopping or repairing one is a task only for persons with professional training.
Step 3: Pull the vent hose away from the dryer exhaust. Next, remove the port cover from the exterior side so you have full access to the entire ductwork. You will need a dryer vent brush cleaning kit to complete your cleaning properly.
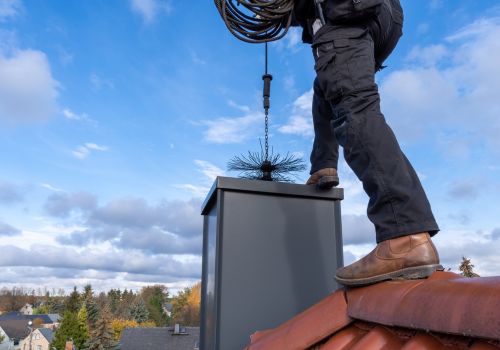
Step 4: Insert your vent brush into the ductwork, turning it counterclockwise as you maneuver the brush through the flexible hose. Lint brush kits come with handle extensions, so you can connect additional lengths as needed. You should be able to push the brush all the way through the hose until it reaches the other side.
It’s best to work from the outside inside, as it deposits any lint and debris on the floor of your laundry room. This will keep landscaped areas outside your house looking their best and simplify cleanup. Additionally, if your exhaust port is set higher than the dryer vent, gravity helps clear debris more efficiently. Don’t forget to clean out the exhaust port thoroughly as well, as this can collect a significant amount of lint and debris.
Step 5: Vacuum up all the lint you’ve brushed out of the flexible hose and other ductwork. You may be surprised at just how much has accumulated, too. Give both the flexible hose and the dryer vent a thorough going over with the vacuum cleaner as well as using the hose attachment. Additionally, pull the lint trap and vacuum out its compartment to remove any lint that slipped by the trap. Keep vacuuming until there is no more existing lint to remove anywhere in the ductwork, dryer and exhaust port.
Step 6: Reassemble the dryer exhaust hose connections, making sure to replace any tape that won’t seal properly. An improperly sealed exhaust can cause problems later, and you may have to clean your dryer vent and exhaust system again sooner than you planned. Finally, before you push your dyer back against the wall, give it a test run. You want to verify all the connections are tight and that the dryer is functioning properly before you call the job done.
Important Consideration: Before you clean or reconnect your existing dryer exhaust hose, consider replacing it with a rigid, adjustable 90-degree exhaust elbow system. Flexible foil hoses and plastic hoses are known to be fire hazards, and a rigid system is safer and much easier to clean.
Conclusion
Clearly, cleaning your dryer vent, hose and exhaust is an important part of regular dryer maintenance. The most important things to keep in mind are checking regularly for excess buildup and cleaning excess buildup promptly. Furthermore, after cleaning, verify that you have tightly sealed connections when you reassemble the dryer exhaust. Each of these items will help you keep your dryer running safely and efficiently for years to come.


